How to make a gift bag from wrapping paper
In days of yore, a gift bag was the last resort for those who don’t have time to wrap or were giving oddly-shaped presents that didn’t come with a box — basketball or frying pan, any one?
According to Hallmark, gift bags with handles were introduced in 1987. Twenty-five years later, in 2002, they became the top option for gift givers and have continued that popularity every year since.
While the commercial versions are easy to save and use again and can become a tradition of their own, bags can be more expensive than paper, and the design options are more limited than those on paper rolls.
There’s a compromise, though: Those with a bit of creative flair and some crafting ability can make their own gift bag using wrapping paper they purchase or already have on hand. This approach is less expensive than buying all but dollar store gift bags.
You can also repurpose the giant sheets of paper removed from big gifts at Christmas, or sustainably repurpose the vast collection of mostly-used rolls lurking in your attic, garage or craft closet. Odd bits of ribbon are a good option for handles, too.
One approach involves using a template to cut and fold the bags. A printable version is available at Martha Stewart online.
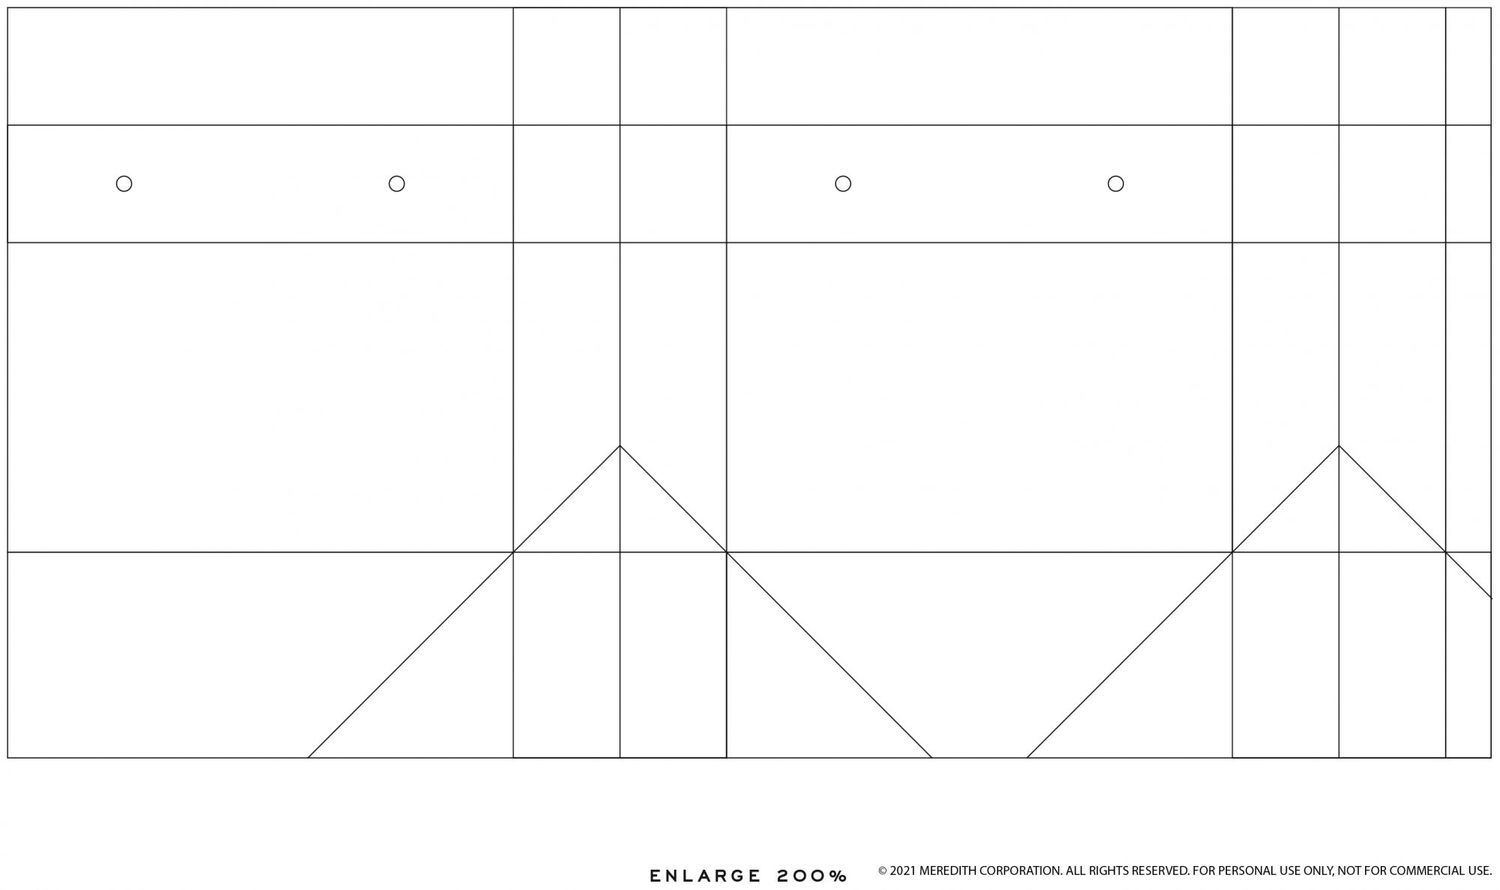
You can also use a box as a form to fold the bags, following these directions drawn from the A Beautiful Mess blog created by sisters Elsie Larson and Emma Chapman:
Supplies
Wrapping paper, a box to use as a guide, measuring tape and ruler, pencil, a glue stick or double-sided tape, a hole punch, ribbon or sisal twine, light cardboard for the base (optional)
Directions
- Cut the light cardboard that will stabilize the base (optional): Set the box, open end at the top, on the piece of cardboard or poster board you plan to use to stabilize the bottom of the gift bag. Trace the shape with a pencil, and cut it out.
- Prepare the wrapping paper: “Lay your box onto the unrolled paper and cut out a length of the paper that leaves about three inches overhang on each end of the box,” Beautiful Mess advised.
- Use the box to create the bag: First, fold the top two inches of the paper on one side, creasing it sharply with the edge of your thumb. This is a tricky part: “Position your box right up to the edge of the crease you just made and wrap the paper around it, so that the seam is on one of the edges of the box, not on a face of the box,” the bloggers added. “Use a glue stick to close off this seam.” Another option is to fasten the seam using two-sided tape, or to create a shorter bag by aligning the folded edge of the wrapping paper just halfway up the box mold.
- Fold the base of the bag: Upend the paper-covered box so that the creased edge faces down and the overhang paper is at the top. Now you’ll form the bottom of the gift bag as if you were wrapping a gift. Beautiful Mess recommended “pushing in the sides of the paper and creasing the triangles of paper that are left sticking up...[then pushing] down those triangular flaps and gluing them into place, making sure to only put glue where the paper touches paper, not the box inside.”
- Insert the base: If you’re using cardboard or cardstock to reinforce the bag, gently insert it inside now. If it’s too wide, sheer just a bit from the edges with sharp scissors.
- Release the bag from the box: Once the glue has dried completely, ease the box from the wrapping paper.
- Tie with a bow or add handles: Punch two holes about an inch from top of the creased lip of the bag on each side, spacing them three or four inches apart, depending on how big the bag is.
- Fasten the bag shut by threading ribbon through the holes and tying it in a bow, or create handles by looping one ribbon through the holes on each side of the bag, and tying a knot on each inside the bags.
Our picks this week
The Atlanta Journal-Constitution is your No. 1 source for things to do, see, make, buy and eat through the holidays. Here are our recommendations:
LISTEN: What’s on Atlanta Mayor Andre Dickens’ holiday playlist?
DRINK: Here’s the holiday spirit Atlanta’s sipping this Christmas
DO: Seven places to show off your ice skating moves in and around Atlanta
VISIT: Full AJC holiday guide for things to do, buy and enjoy
For our full coverage of holiday events around metro Atlanta, check out the AJC’s Things to Do page.