How to smoke the best BBQ ribs: Chef David Rose’s foolproof 2-2-1 method
Few things in life bring me more enjoyment than cooking a perfectly smoked rack of ribs. The exceptional bark. The sticky, well-lacquered BBQ sauce. The firm yet tender bite of perfectly rendered pork. And that sweet, smoky sauce dripping down my chin after every bite.
To me, that’s quintessentially what barbecue is.
Every lover of BBQ has their own opinion about what makes great ribs. Some are like a moth to a flame and swear by fall-off-the-bone tenderness, while other BBQ aficionados desire a firmer, clean bite that leaves the perfect teeth marks in the meat. I fall into the latter camp. I want ribs that have great texture and an exceptional chew. If I want fall-off-the-bone ribs, I might as well indulge in pulled pork.
Over the years as a chef, grill lover, and spokesperson for steak and grill companies, I’ve cooked hundreds of racks of ribs—at home in my backyard kitchen, at festivals, and several times on TV. Through trial and error, eating my weight in great BBQ, and experimenting with different methods, I’ve learned that incredible ribs unfortunately don’t happen by accident. They’re the result of diligence, patience, solid yet simple techniques, and utilizing the right smoker for your intended outcome.
These are the exact steps I follow each and every time I fire up my smoker or grill. They consistently produce ribs that easily separate the ordinary from the extraordinary.
How to choose the best ribs for smoking
Before even lighting one coal in the grill, it’s very important to choose a quality rack of ribs.
For backyard warriors and home cooks, baby back ribs are a favorite. Baby back ribs are leaner than spare ribs, cook quite a bit faster, and have an incredible meat-to-fat ratio and tenderness when cooked properly. St. Louis-style ribs are my personal favorite and an excellent choice for those who prefer a meatier, more richly marbled rib with deep pork flavor.
No matter the rib cut you choose, always look for racks with good marbling, even thickness from bone to bone, and plenty of meat covering those bones. Avoid ribs with significant exposed bones—called “shiners.” That’s a telltale sign the rack was cut too close. Too many shiners can cause the ribs to dry out even more during cooking.
No matter what your cooking method, great barbecue always starts with great ingredients. Without quality ingredients, your finished product will always fall short.
Why you should use mustard as a binder for ribs
Start by removing the thin membrane from the back of the ribs. This membrane is chewy, tough, doesn’t break down during cooking, and slows the meat from absorbing smoke. An oyster shucker or butter knife, along with a paper towel, will make quick work of its removal.
Once the membrane is removed, pat the ribs dry on all sides with a paper towel and apply a thin layer of yellow prepared mustard before seasoning with BBQ rub. The mustard acts as a binder, and you won’t taste it once the ribs are cooked.
The mustard’s sole job is simply to help the seasoning and/or rub stick to the meat while creating a beautiful bark that will be highly coveted, loved, and well enjoyed.
A beautiful bark is a must in well-executed BBQ.
How to season BBQ ribs with the right dry rub
Now is not the time to be shy. Let that rub rain!
Season generously on both sides. Big flavor is the name of the game when it comes to BBQ. A large part of that flavor begins with properly and adequately seasoning the rack of ribs.
After seasoning your ribs, allow them to rest for about 20 to 30 minutes while you wait for your smoker or grill to come up to temperature. Resting the seasoned ribs before placing them on the grill allows time for the rub to adhere to the meat and for the salt in the rub to begin tenderizing and flavoring the ribs.
Thus creating culinary magic.
Why low and slow is the best way to smoke ribs
People are always looking for shortcuts when it comes to barbecue. The unfortunate truth is there really aren’t any when it comes to creating quality BBQ.
Great BBQ—especially BBQ ribs—simply takes time and patience.
The sweet spot that I like smoking at is between 225°F and 250°F. This low smoking temperature allows the collagen and connective tissue inside the ribs to slowly break down and the fat to render without drying out or overcooking the ribs.
You can always cook hotter, faster, and sooner … but the likelihood of them actually being good is highly unlikely.
Low and slow is the way to go for putting smiles on faces at backyard BBQs and creating championship barbecue for generations. There is one simple reason why: It works!

The 2-2-1 method for baby back ribs
The 2-2-1 method is my go-to for consistently moist, flavorful baby back ribs. The numbers simply represent the cooking times.
Step 1: Smoke the ribs unwrapped
For the first two hours, cook the ribs uncovered, bone-side down. This is where the flavor and magic begin.
Savory smoke begins to penetrate the meat, the exterior starts to dry slightly, and that deep, beautiful, soul-captivating mahogany bark begins to develop.
A novice mistake many backyard pitmasters make is opening the smoker or grill every fifteen minutes to admire the ribs. As the old adage goes, “If you’re looking, you ain’t cooking.”
Every time you open the smoker lid, heat and smoke escape, slowing the cooking process and adding time for the smoker to recover and build back up that smoke.
Simply trust the process and allow the ribs to do their thing.
During this time, give the ribs a quick spritz of apple cider vinegar or a mixture of apple juice every hour to help maintain surface moisture and keep the bark from getting too dark and dried out.
Step 2: Wrap the ribs in butcher paper
Let’s wrap it up… the ribs, that is.
Place the ribs on two sheets of butcher paper large enough to wrap them. Add a splash of apple juice, honey, and a tablespoon or so of unsalted butter if you want to be extra luxurious.
Then double-wrap the ribs tightly. This step in the process is called the “braising phase.”
The moisture from the flavorful liquids will help tenderize the meat while still preserving much of that beautiful bark.
The ribs will push through what’s called “the stall.” This is when evaporation temporarily slows the cooking process and the internal temperature stalls between 150°F and 170°F. By wrapping the ribs, they push through the stall, and the internal temperature continues climbing toward approximately 195°F to 205°F. This is the temperature where the collagen, fat, and connective tissue break down and become gloriously delicious.
Butcher paper vs. aluminum foil: Which is better for smoking ribs?
This is definitely a hot topic and a ferocious debate in the barbecue world. I personally favor butcher paper over aluminum foil.
Butcher paper is porous and breathable. It allows enough airflow to keep the bark intact, still lets the meat pick up smoke, and still holds enough moisture to keep the ribs juicy. Adding a flavorful liquid enhances that even more.
The resulting ribs have a firmer texture and a more pronounced smoky flavor.
Aluminum foil is great for those looking for a more expedient cook time, but the results vary.
It seals in virtually all the moisture, creating a “steam effect” with the ribs.
For those who covet soft, fall-off-the-bone ribs, aluminum foil absolutely holds the key to that desired result.
Neither method is inherently right or wrong. It simply boils down to personal preference.
As for me, great barbecue is all about texture, and I find aluminum foil to be the lesser of the two when it comes to that. That’s why butcher paper wins with me every time.
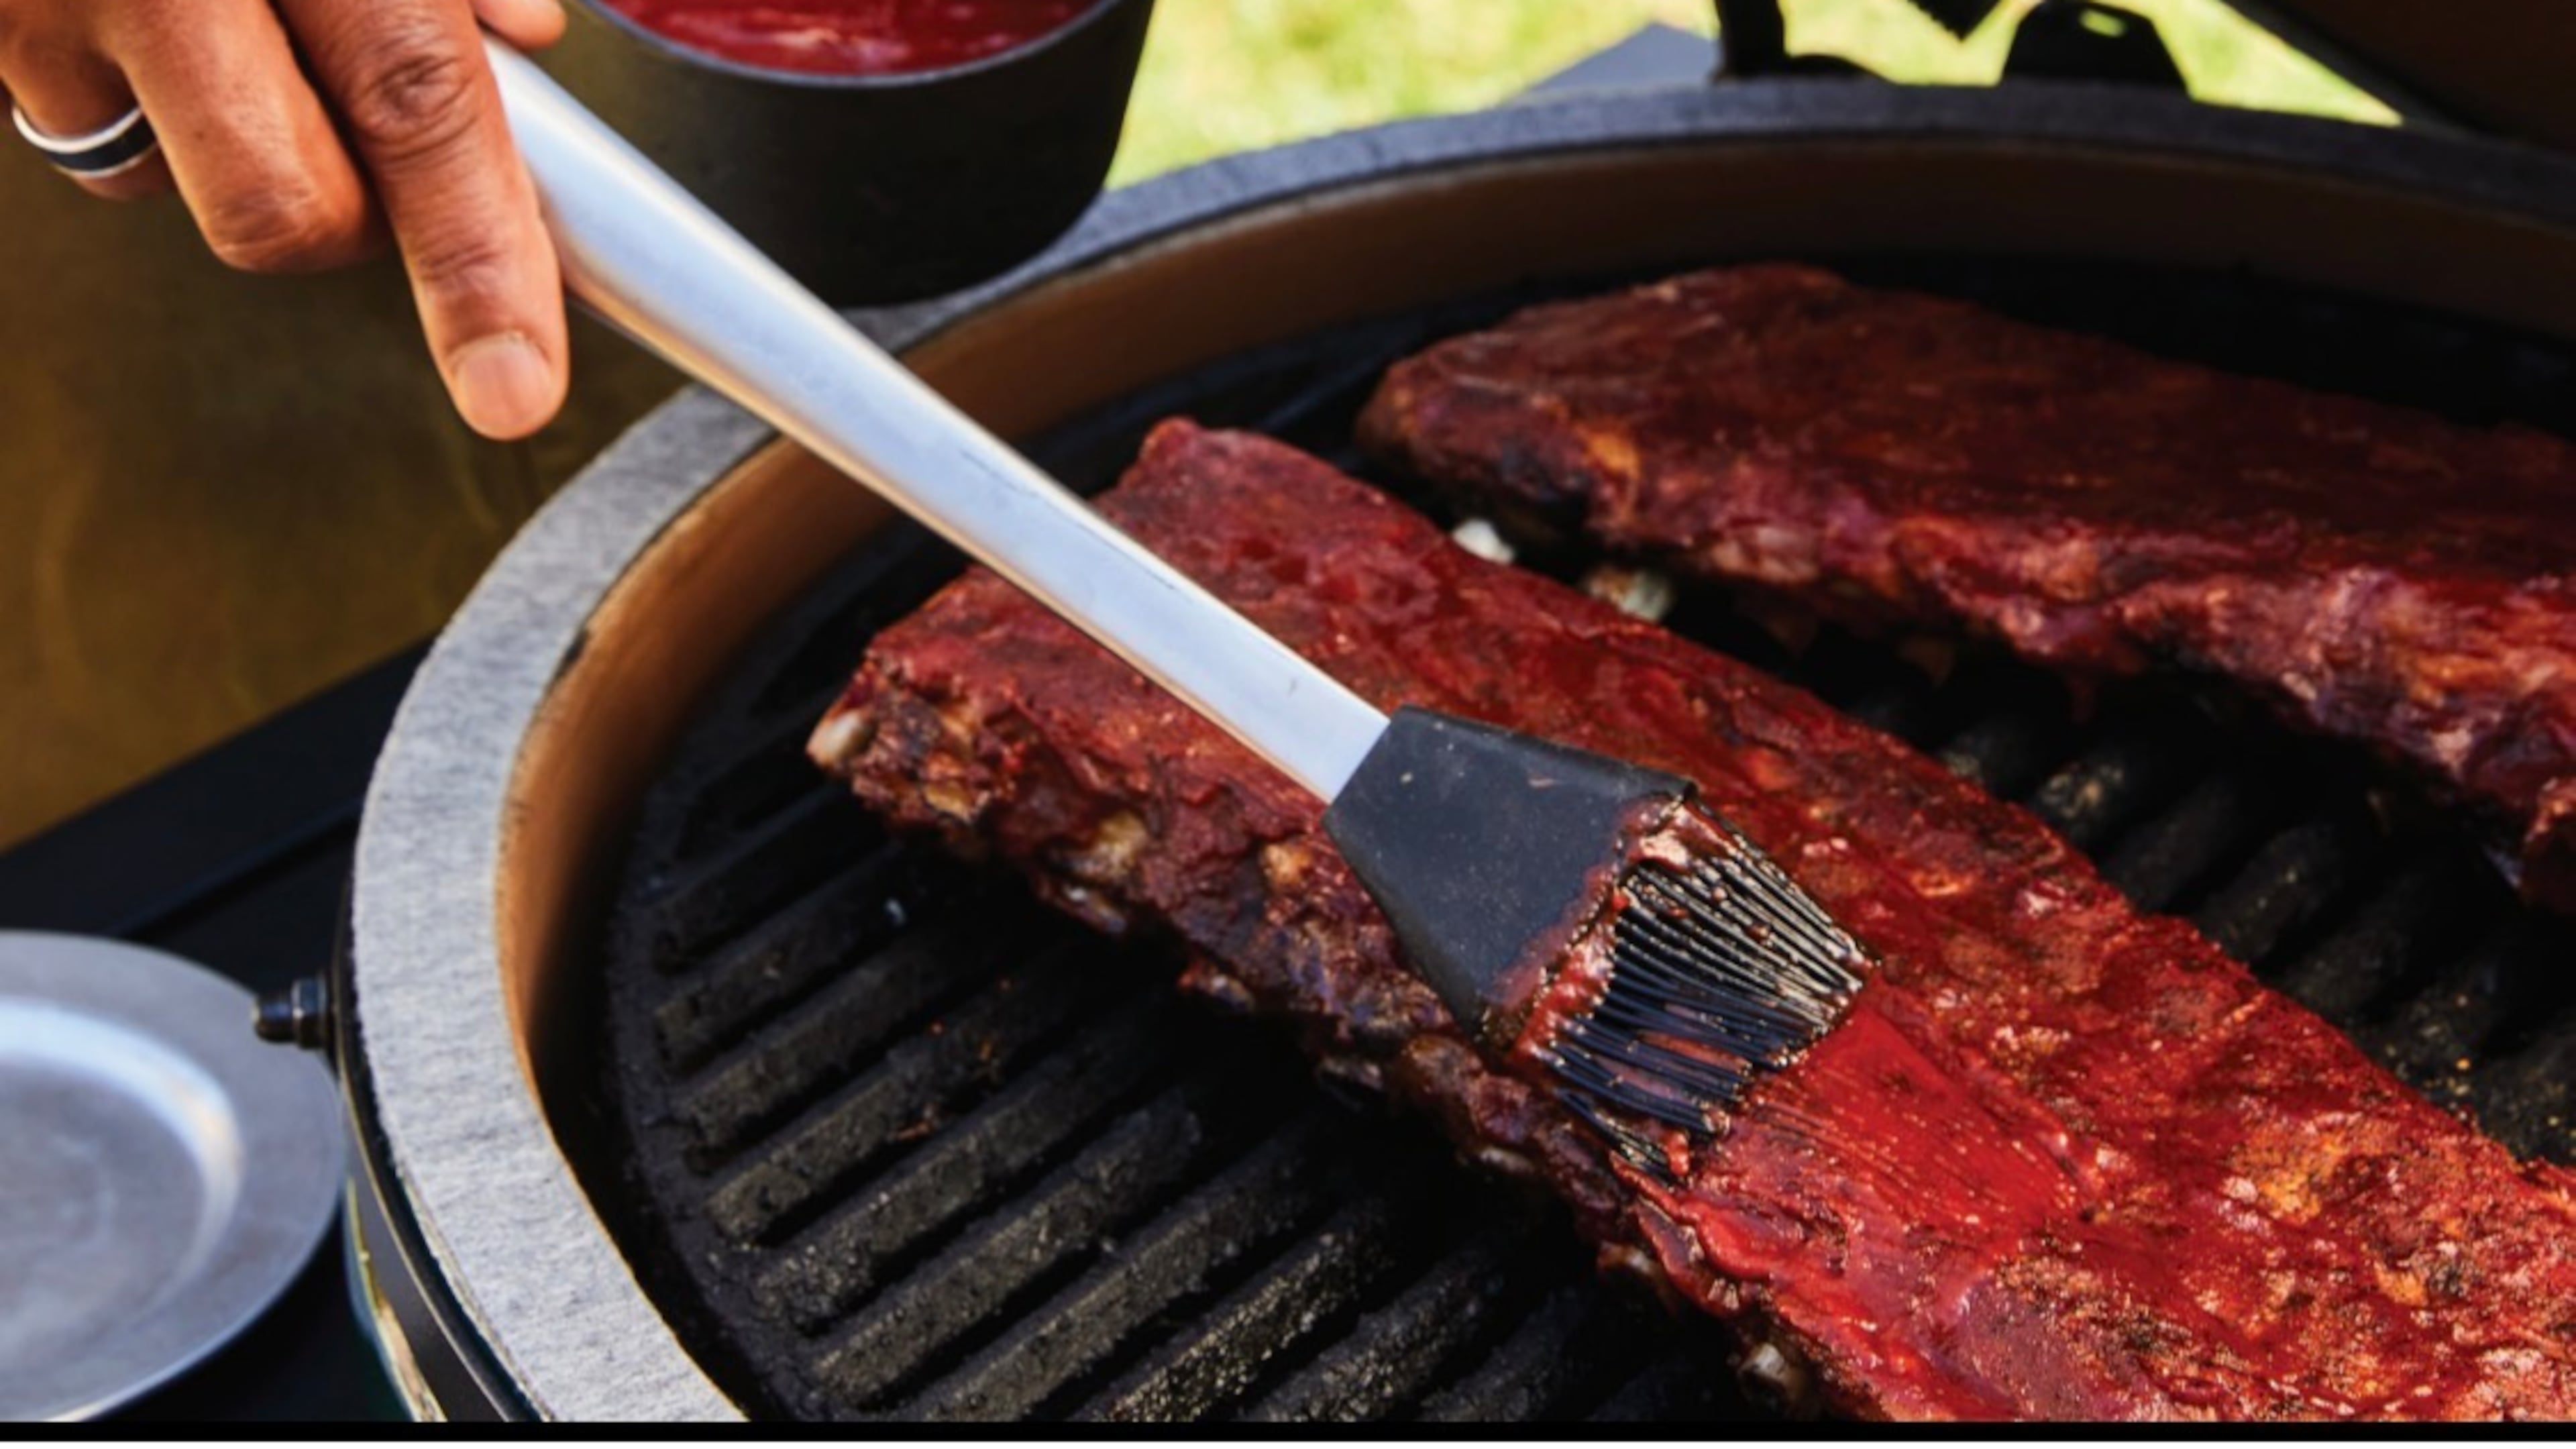
Step 3: Sauce and finish the ribs on the smoker
Now we unwrap the ribs and place them back on the smoker.
During the first 30 minutes, the bark begins drying again and firms back up. This creates the perfect environment for the BBQ sauce to begin being applied.
During the last 20 minutes of cook time, lightly brush a thin coating of your favorite BBQ sauce over both sides of the ribs. Dealer’s choice on homemade or store-bought.
A thin layer of sauce is optimal at this stage because it creates a beautiful lacquered, sticky, glossy finish as the sauce caramelizes.
After about 10 minutes, brush on one final light coat of BBQ sauce.
A double coating of light sauce is all you need, as adding too much sauce masks the natural flavors of the meat, smoke, and rub.
The natural savory and sweet flavors of the pork should always be center stage.
How to tell when ribs are done
Cooking times are simply guidelines—a template to give you an overall idea of how long ribs take to cook. But you should never cook by time alone. You want to cook to doneness, internal temperature, and your desired results.
Every rack of ribs is different. The pig’s anatomy, fat content, different smokers, temperature fluctuations, and even the weather can all affect cooking time.
Instead of solely relying on the clock to determine doneness, I strongly recommend learning to watch the ribs themselves.
When lifting the rack with a pair of tongs, the ribs should bend easily and begin to crack slightly across the top.
Another great indicator of doneness is using a temperature probe to check the internal temperature. A wooden or metal skewer can also give you a good read by sliding it into the meat. If there is little to no resistance, that’s when you know your ribs are ready to rock.
Why resting BBQ ribs is essential
Resting your ribs is a step many people skip, but it’s essential. Just like steaks, briskets, pork shoulders, and other large cuts of meat, ribs also benefit from resting.
As the meat rests, carryover cooking puts the final touches on the ribs as the juices redistribute and the muscle fibers continue to relax. Resting results in a noticeably juicier rib.
Wrap the ribs and let them rest for 10 to 30 minutes on a cutting board, plate, or turned-off oven. For longer holds, I suggest double-wrapping the ribs in butcher paper, wrapping that in kitchen towels, and placing them inside an insulated cooler like a Yeti or Igloo.
This trick is what results in competition-quality BBQ ribs as opposed to your normal run-of-the-mill ribs.
The secret to the best BBQ ribs
I’m often asked what the secret ingredient is for great barbecue. The answer isn’t an expensive rub, a fancy smoker, or some trade secret.
In actuality, the secret is patience.
Respect the fire. Respect the meat. Respect the ingredients. Honor the smoke. Never rush the process.
Barbecue is a tradition that has always been deeply rooted in slowing down and doing things right the first time in a methodical manner.
Barbecue is a celebration of family, friends, and enjoying food as it was intended to be enjoyed—over smoke and fire. Gathering together and sharing something beautiful as smoky aromas roll through the backyard.
BBQ ribs are always the first thing to disappear at my backyard barbecues and family gatherings. The reason is simple: when BBQ ribs are done right, without shortcuts and patiently tended to, it’s hard to beat that perfect bite.